Parental Arts
DIY Paper Easter Baskets
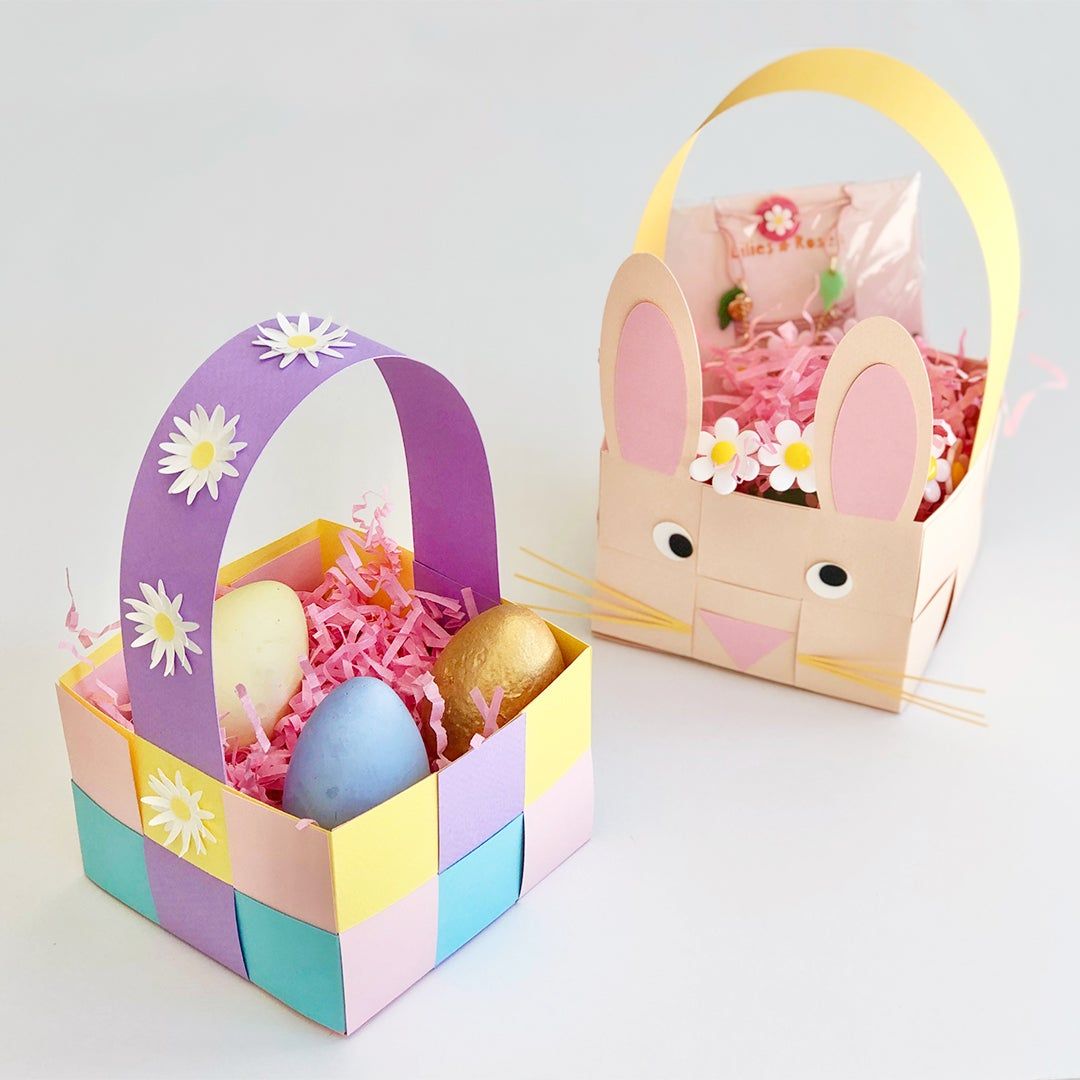
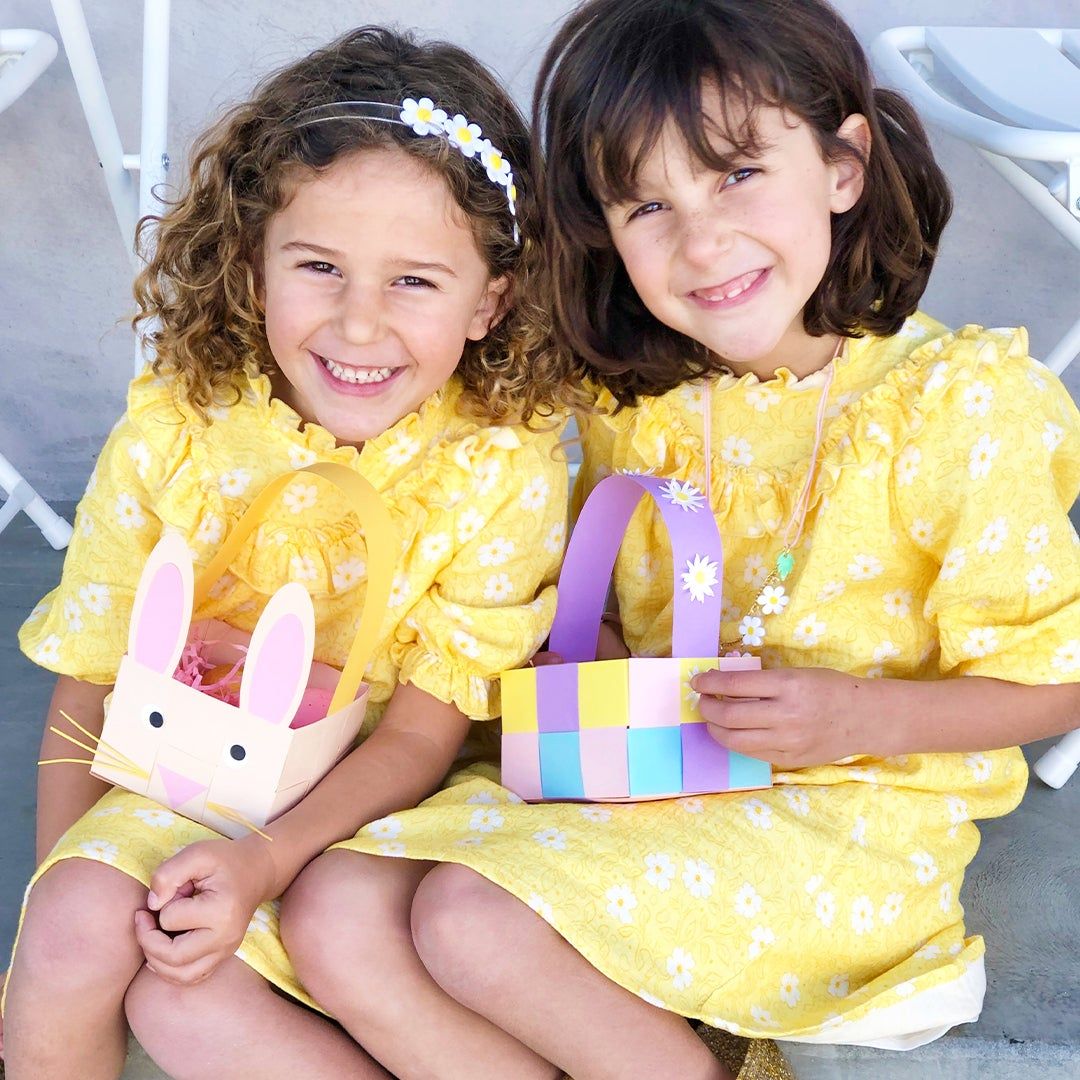
Create an Easter basket as sweet as its contents with this simple spring-inspired paper craft from artist Chloe Fleury.
Download the template here.
Download the template here.
- Written By
- Chloe Fleury
Step 1: Weaving
- Cut six 1.5" x 10" strips of colored paper.
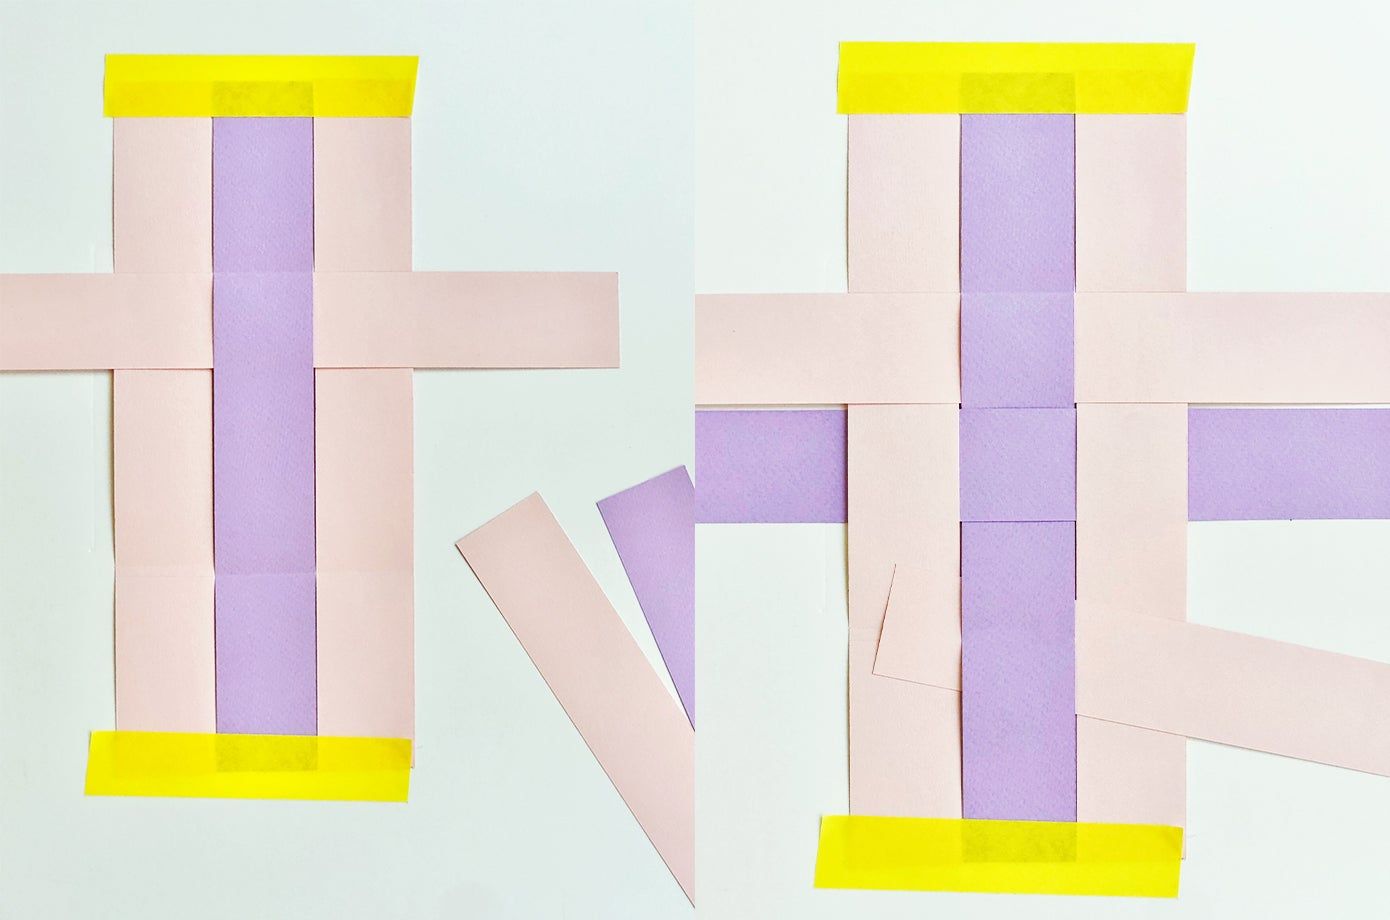
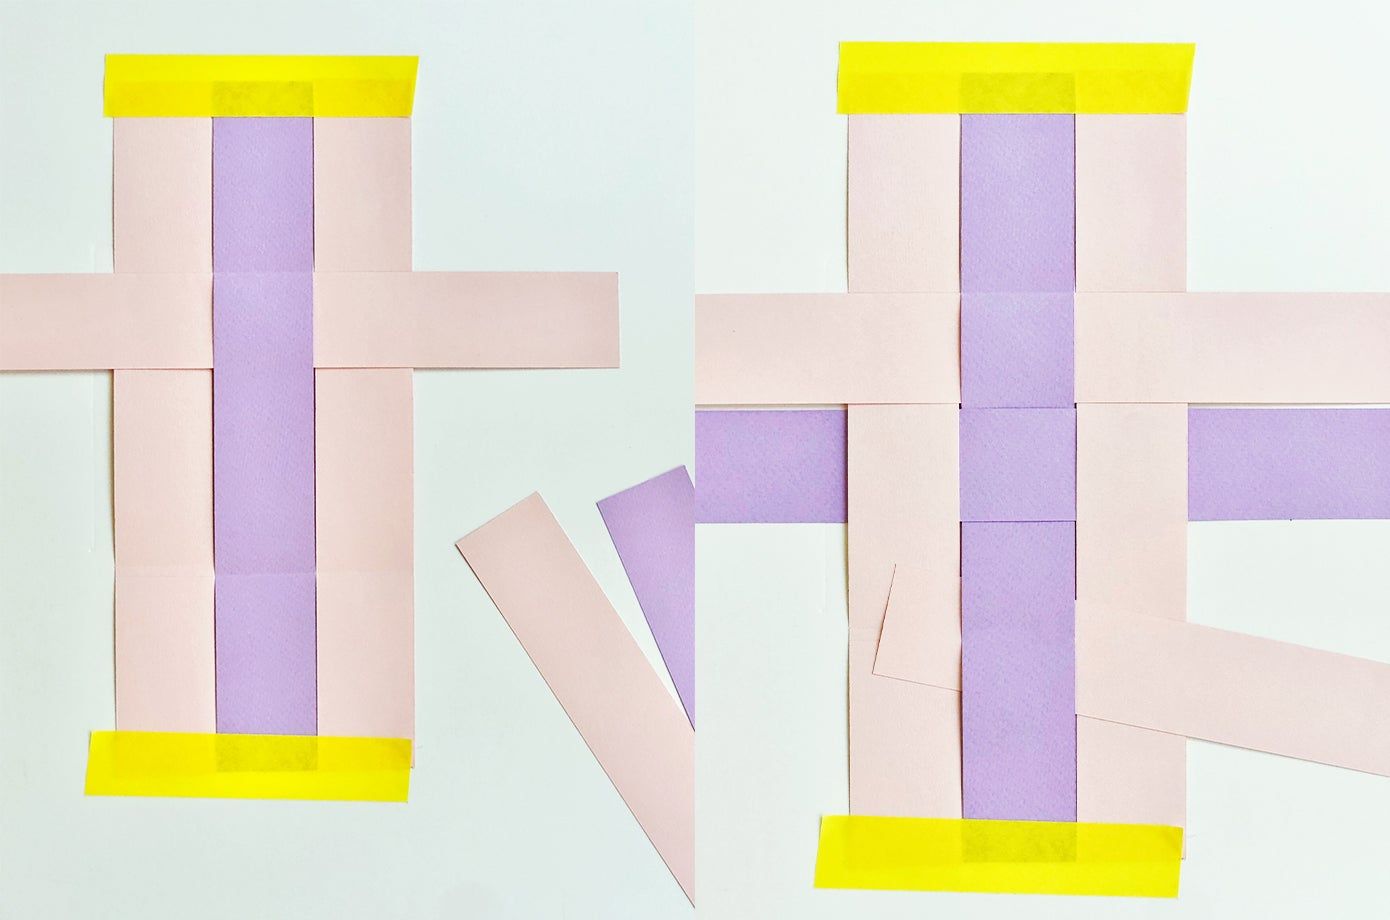
- Align three strips of paper vertically, parallel side by side. Secure the ends of the strips with tape to your surface.
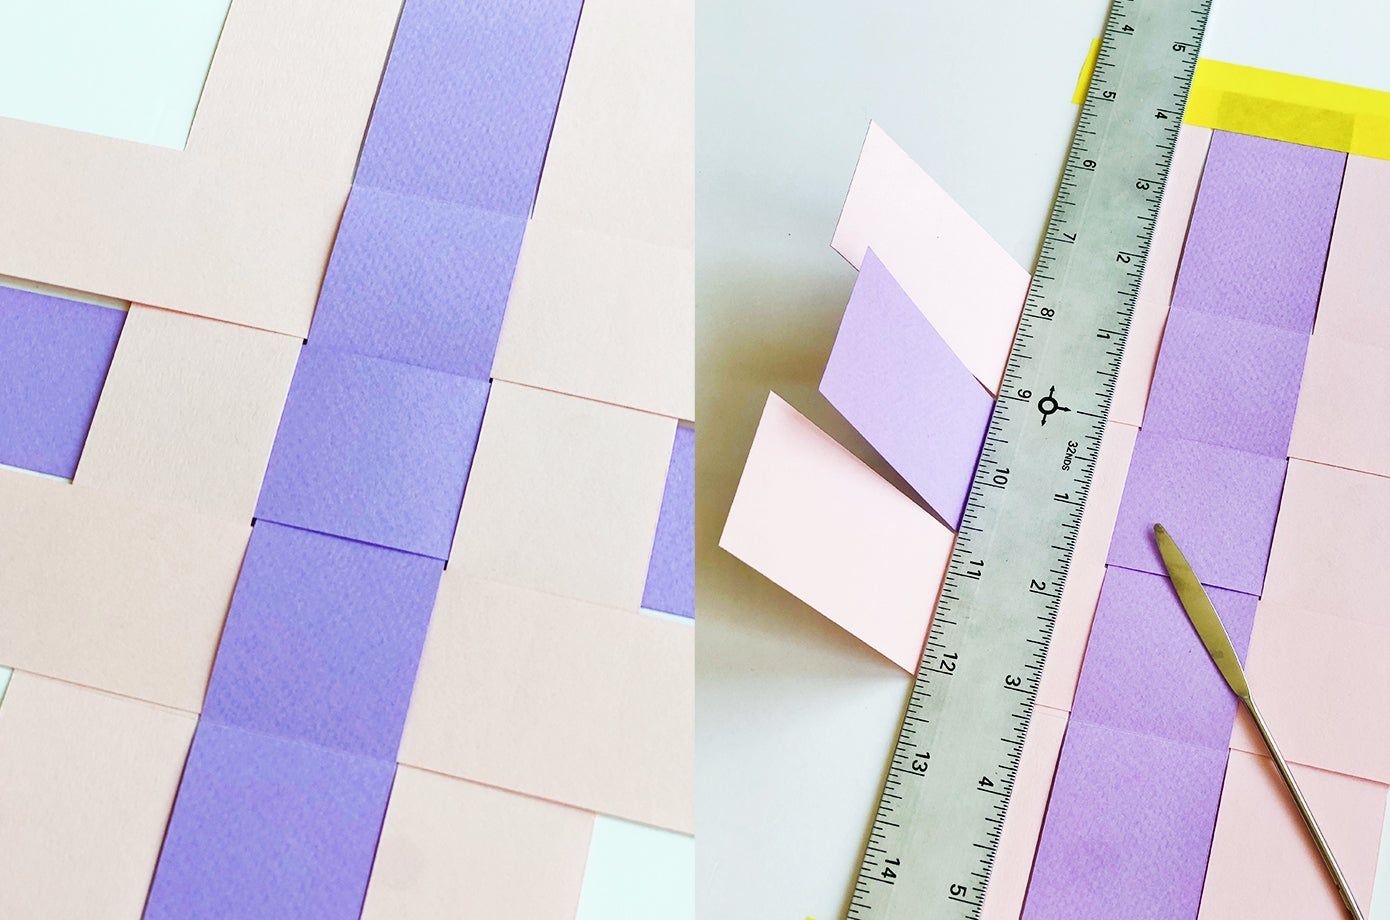
- Align the fourth strip perpendicularly to the three fixed strips. Starting from the left, weave it over the first vertical strip, under the second, and over the third.
- Align the fifth strip beneath the fourth. Starting from the left, weave it under the first vertical strip, over the second, and under the third.
- Align the sixth strip beneath the fifth. Starting from the left, weave it over the first vertical strip, under the second strip, and over the third.
Step 2: Folding
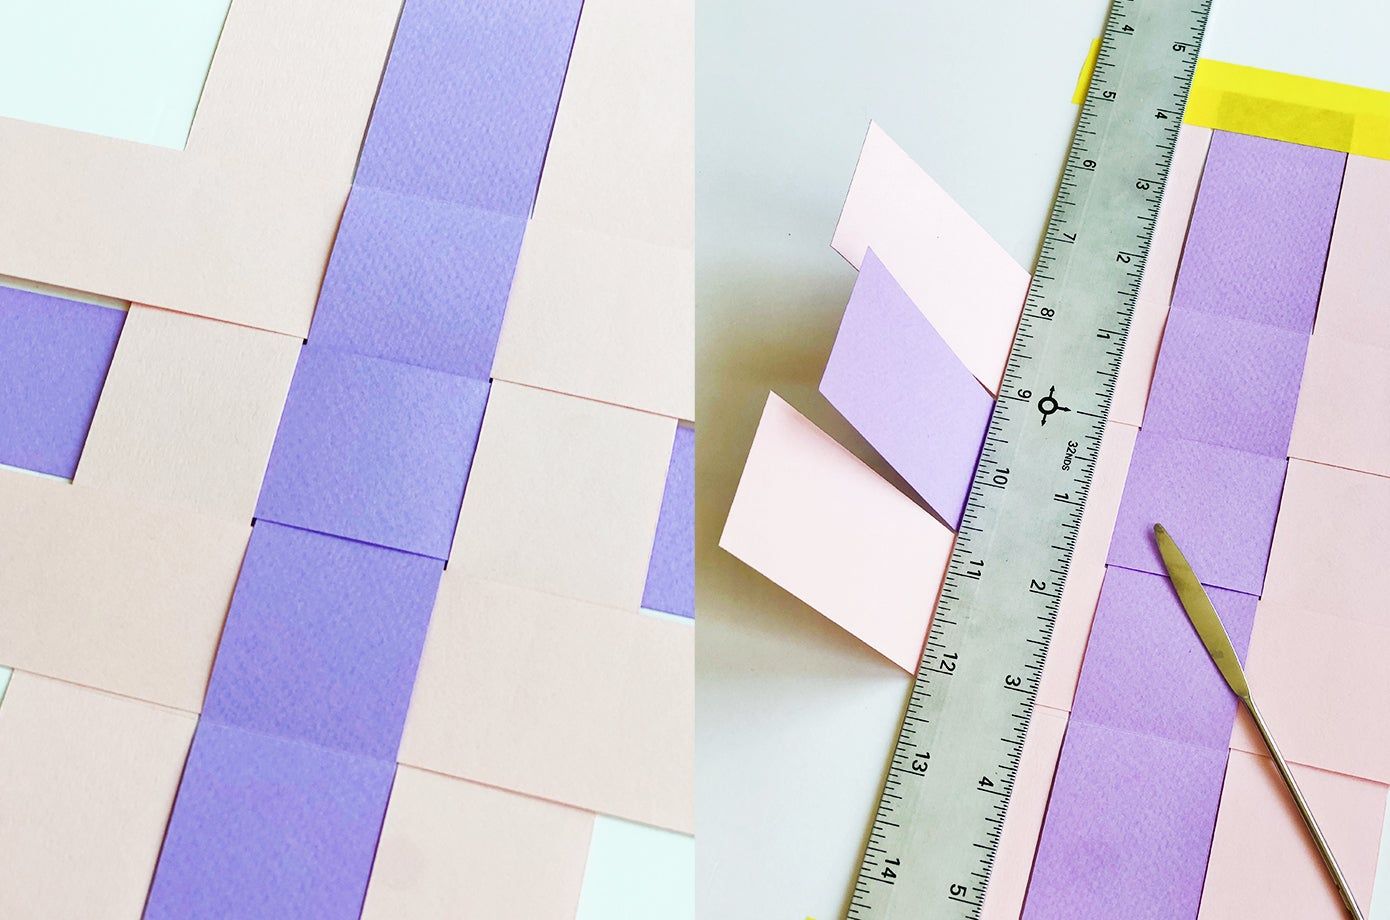
- Once you have finished weaving, the center should appear to be a 9-square grid.
- Line a ruler up along the edge of the grid.
- Fold the edges of the strips that extend beyond the grid towards the center.
- Repeat on all four sides.
- Line a ruler up along the edge of the grid.
- Fold the edges of the strips that extend beyond the grid towards the center.
- Repeat on all four sides.
Step 3: Building
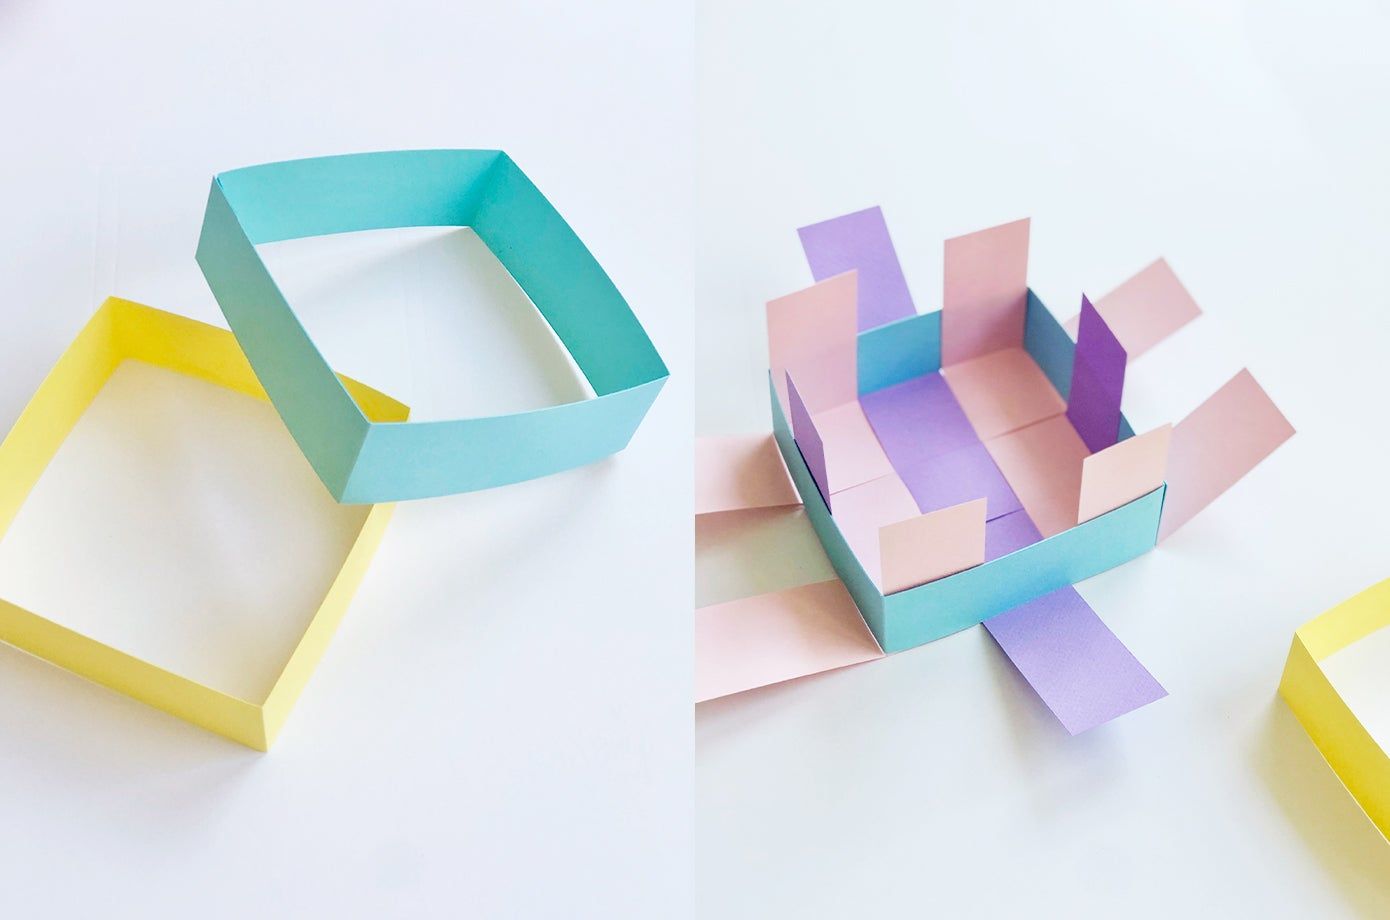
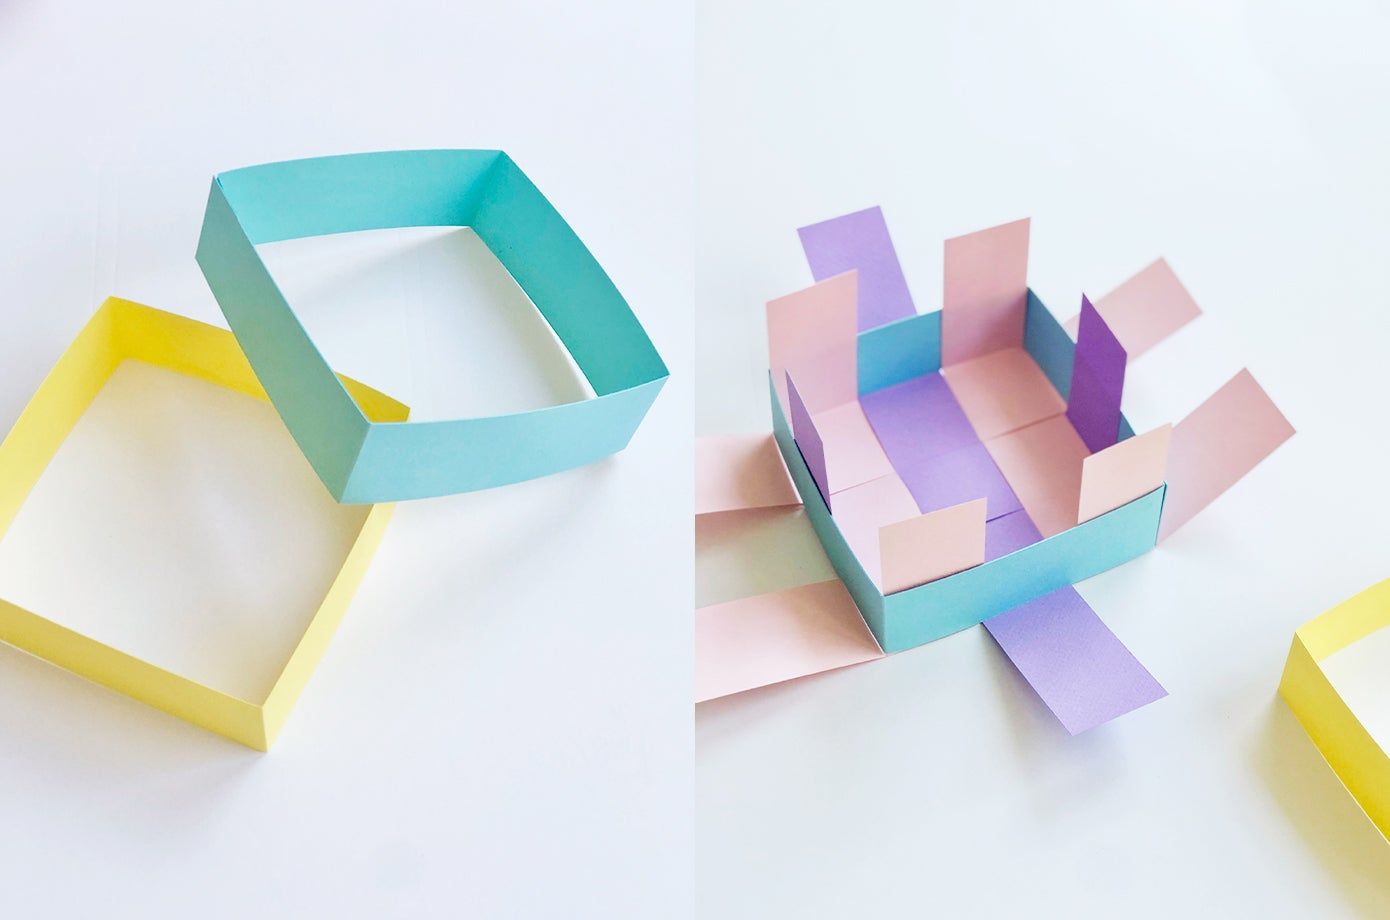
- Cut two 1.5" x 18" strips of paper.
- Fold each strip in equal 4 parts and glue the ends together to form two squares.
- Place one square on top of your grid and weave the stray strips of paper around the square, alternating in and out.
- Place the second square on top of the first and repeat the process, alternating the strips that went inside the first square to go outside the second and vice versa.
- Glue the end of the strips to the top square to secure.
Step 4: Handle It
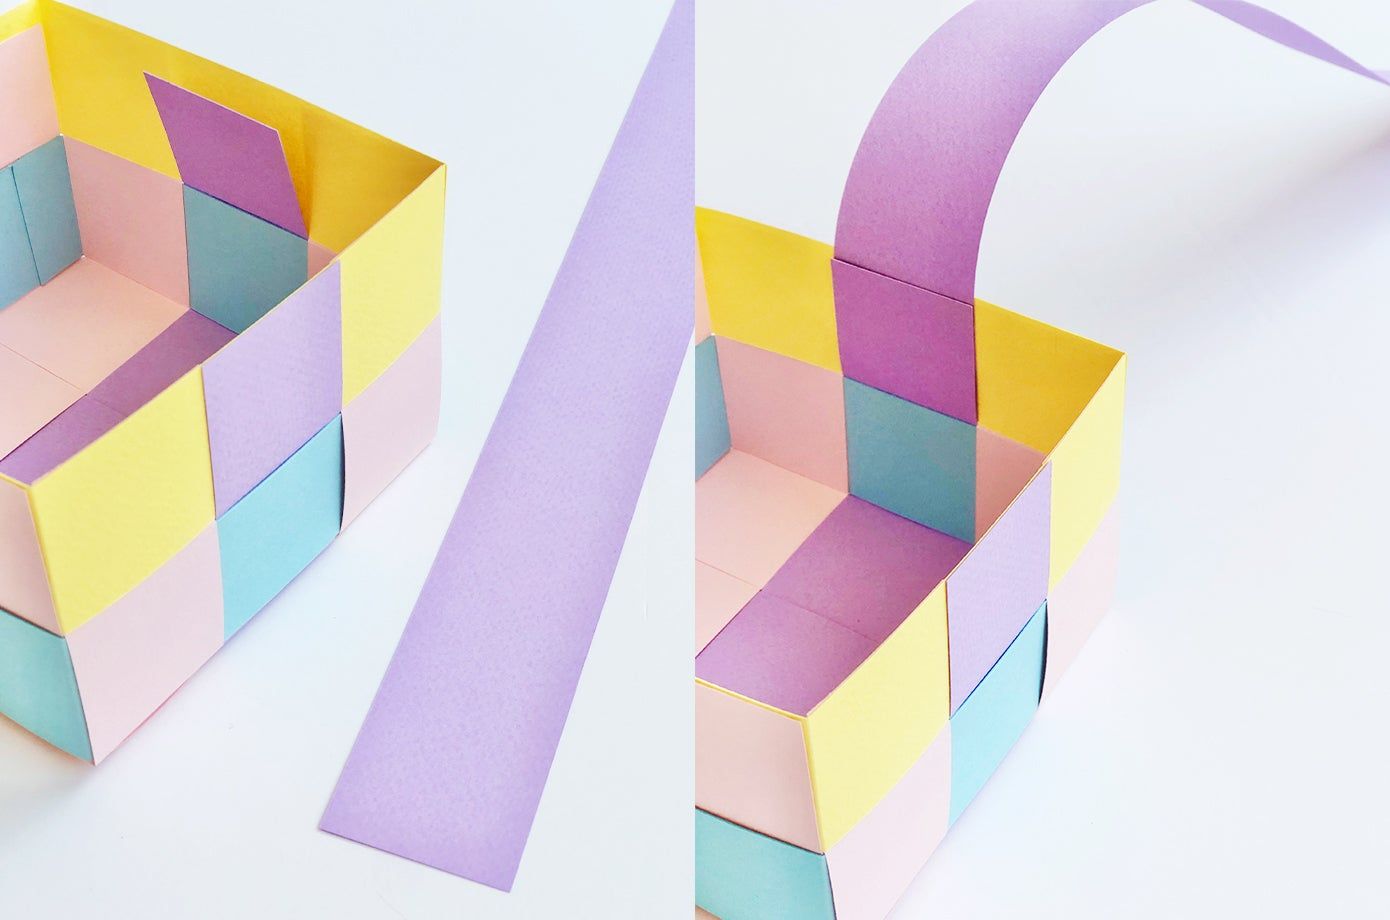
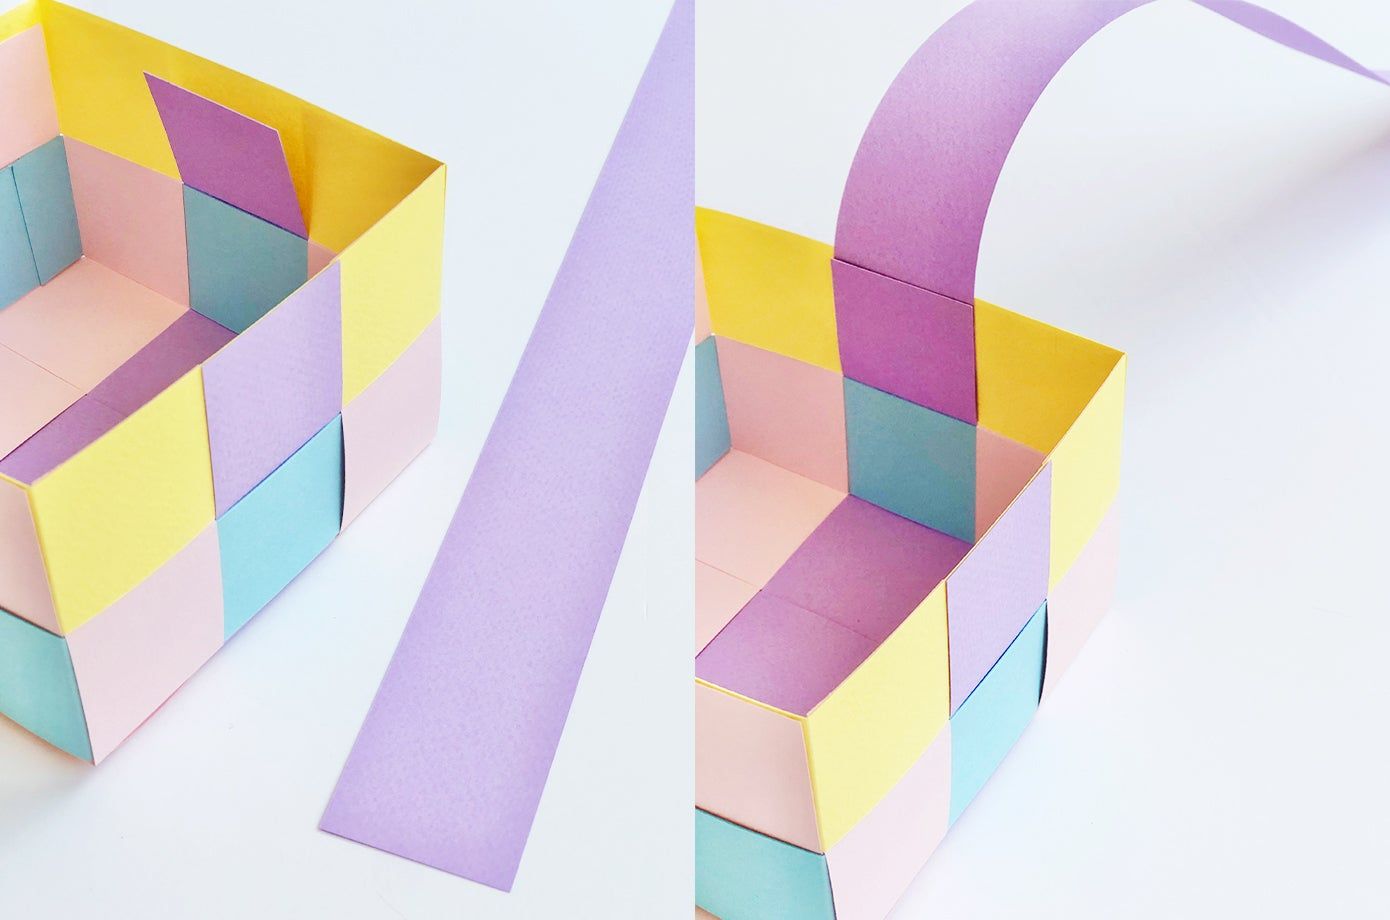
- Cut a 1.5" wide strip of paper for the handle. You can make it as long as you'd like, but a shorter handle will tend to be sturdier.
- Use this strip to create a bridge between two opposite sides of the basket to form a handle.
- Secure each end of the handle to the inside of the basket with glue.
- Use this strip to create a bridge between two opposite sides of the basket to form a handle.
- Secure each end of the handle to the inside of the basket with glue.
Step 5: Decorate!
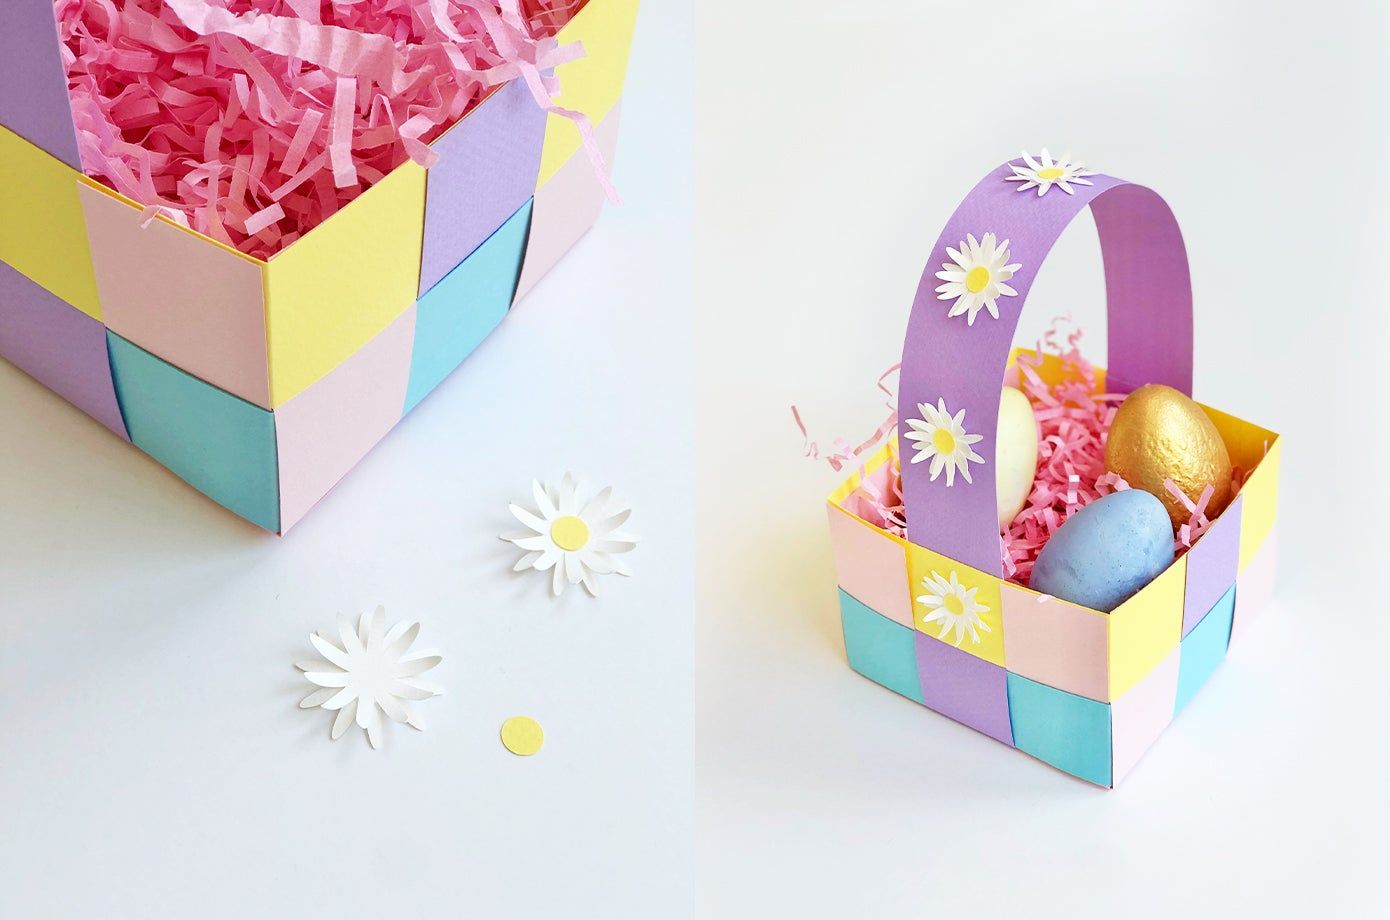
- Now that your basket is assembled, it's time to decorate.
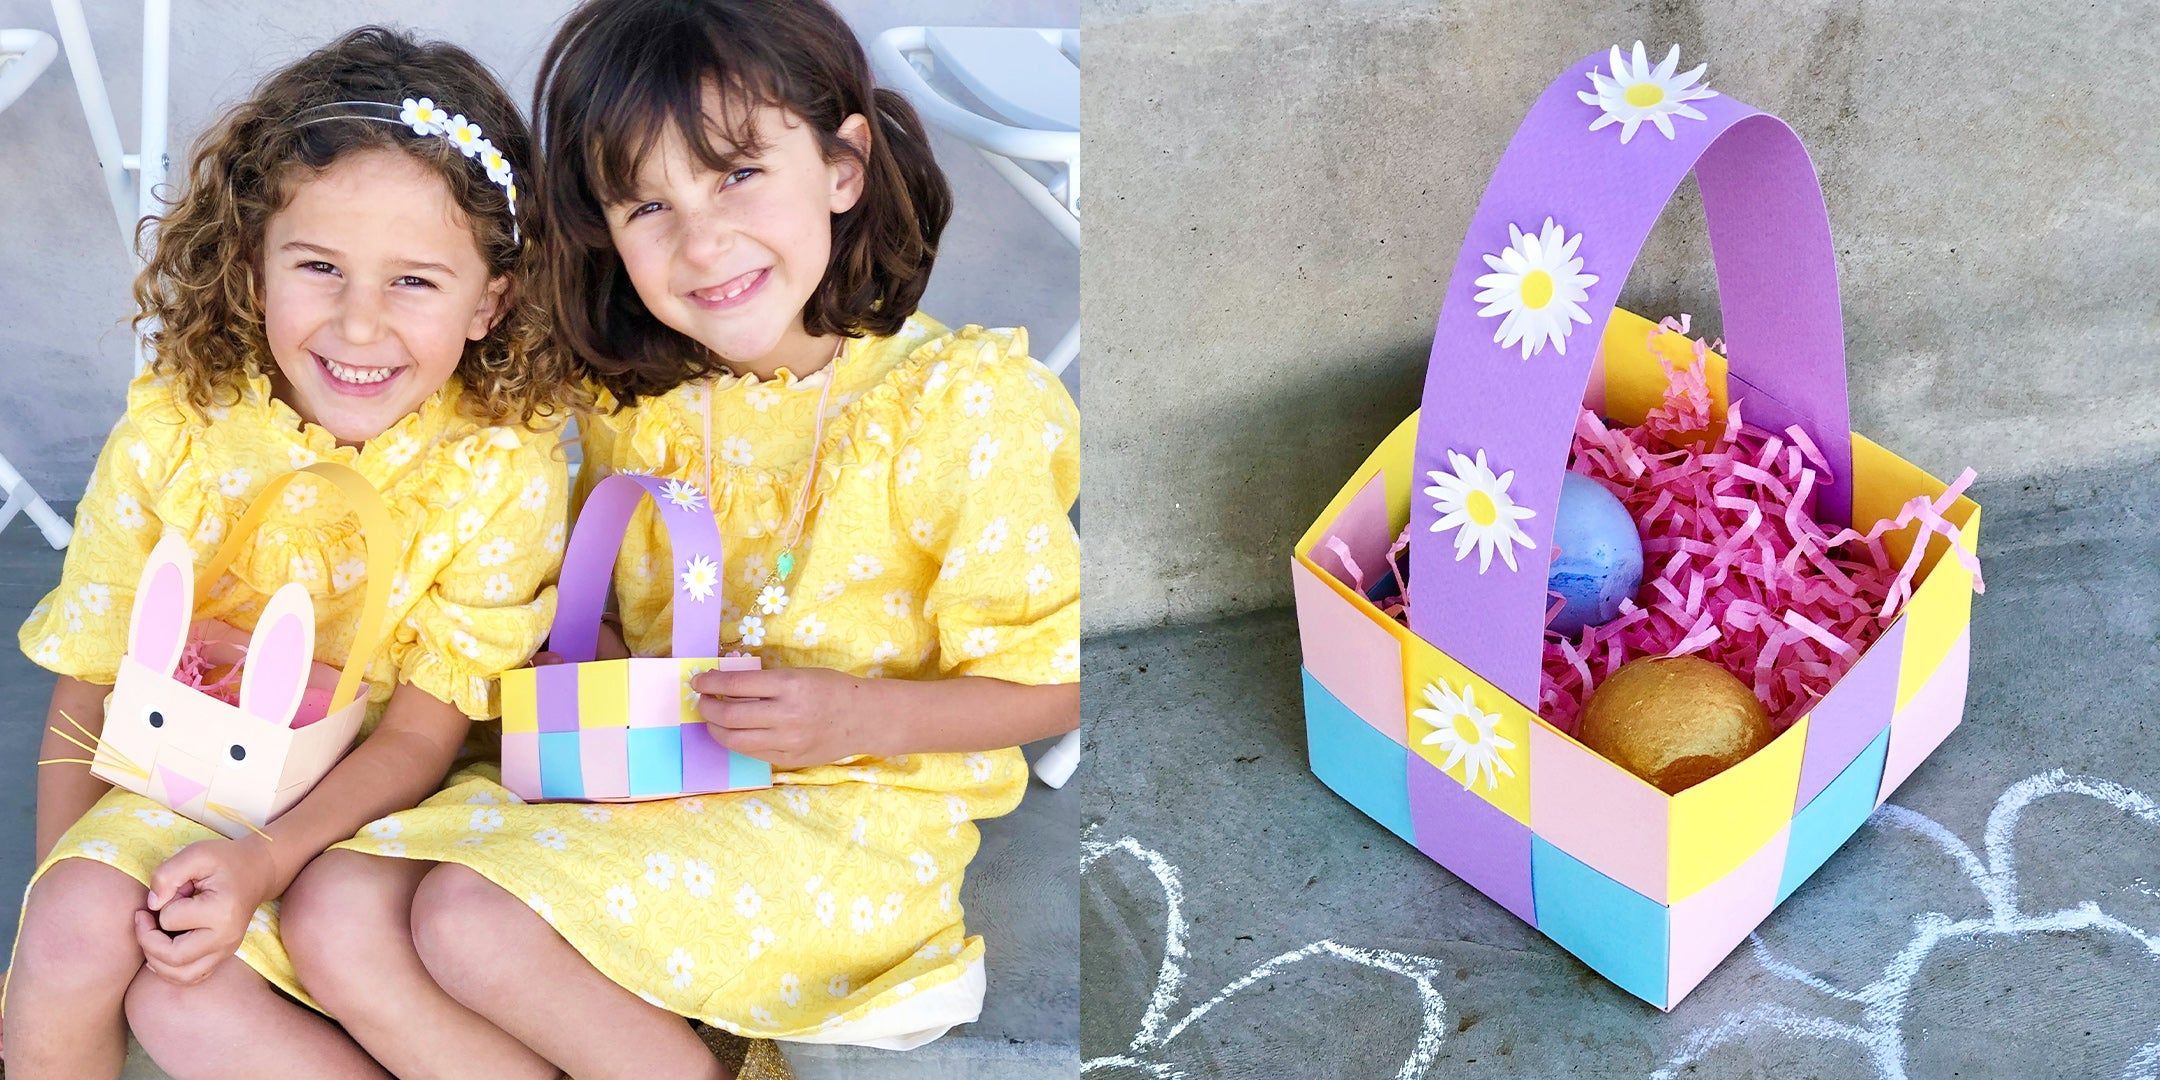
- You can follow our template to place a cute bunny face on the front or embellish with jewels, paper flowers, or whatever tickles your whiskers. Hop to it!
- You can follow our template to place a cute bunny face on the front or embellish with jewels, paper flowers, or whatever tickles your whiskers. Hop to it!
What's In The Basket?
Once you've created your Easter basket fill it with basket fillers and Easter gifts. Find our editor's picks for Easter basket ideas. We've got something for every bunny, from newborns to tweens– a sporty basket, a garden-themed basket, and even baby chicks.)
For more Easter craft ideas we reached out to Darcy Miller to find out her favorite crafts to engage your kids and keep things festive.